Using Briwax Original Wax

Project: Refinishing bare timber furniture
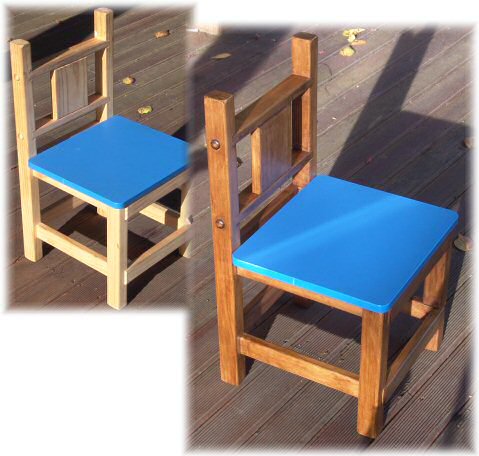
Wax is by far the easiest one-step finish for all bare wood. Nowadays a lot of furniture is supplied bare and unfinished. You can very easily apply a great protecting and decorating finish to these items, personalising the funiture and perhaps matching it with other items in your home. This page shows you how quick and easy it is to add beauty to this bare wood child's chair with Briwax Original Wax.
 Before you start
This particular chair wasn't new; it had been in use for several months. It looks out of place as bare timber, and you can see that where it has been handled at the top the timber has become darkened with dirt and stains. Any bare timber will get very dirty where it's handled; finishing with Briwax will protect furniture against this happening in the future. For this particular chair, we used Briwax Furniture Cleaner to remove the dirt and fingermarks from the bare timber. Pour a little on a cloth and rub the dirty areas. Briwax Furniture Cleaner is very strong and removes dirt, wax, and oils from any furniture.
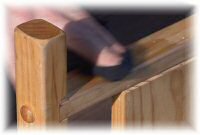
Obviously, if you have new furniture, you don't need to clean it first! However, you might want to check that it's smooth and clean, and perhaps sand off any rough edges if there are any. In the case of this chair, we unscrewed the blue painted seat to avoid accidentally getting any wax on it.
 Applying the wax
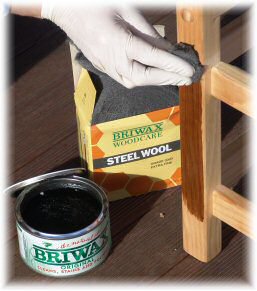
We've chosen Briwax "Dark Oak" wax for this chair. There are a range of colours available, look at the bottom of the "Wax" page for a colour chart.
Using grade 0000 steel wool, or a cloth, just wipe the wax on to the wood. Don't get too worried about the finish, the key is to make sure you get into every corner, and don't leave lots of wax in any one place. Wipe the wax off in the direction of the grain where you can. Using steel wool helps you avoid leaving too much wax in one place.
If the weather is hot, the wax can become liquid. It's more difficult to apply the wax evenly when it's like this, and the wax doesn't go as far. Put the tin in the fridge for half an hour (or the freezer for a few minutes) and the wax will solidify again. When the wax is solid it's easier to apply a small amount and get a better finish. You'll also notice that we're wearing disposable gloves to avoid getting stained fingers! If you accidentally get coloured wax on any nearby surfaces, most paintbrush cleaners will remove it quickly. We've found that wiping with a cloth dipped in 'Kumclean' brand brush cleaner will remove accidental stains immediately.
 The final step
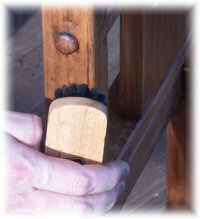
Here's the reason we didn't have to worry too much about getting the wax on evenly. Take a small brush (a shoebrush is ideal), and rub it up and down the grain of the wood. Any uneven streaks or lumps of wax will be evened out very easily. You can see a dark line on this photograph (just above the brush) where there's too much wax -- it disappears as soon as you wipe over with a brush.
The brush also buffs up the wax to bring up a beautiful sheen. If you find you've missed a bit, or you can't brush the wax easily, try applying a little more wax with the steel wool, and then brushing it. We put the seat back on the chair and ended up with the great result shown in the photograph at the top of this page. Look how the darkness of the wax in the corners gives a wonderful antique look to the wood.